
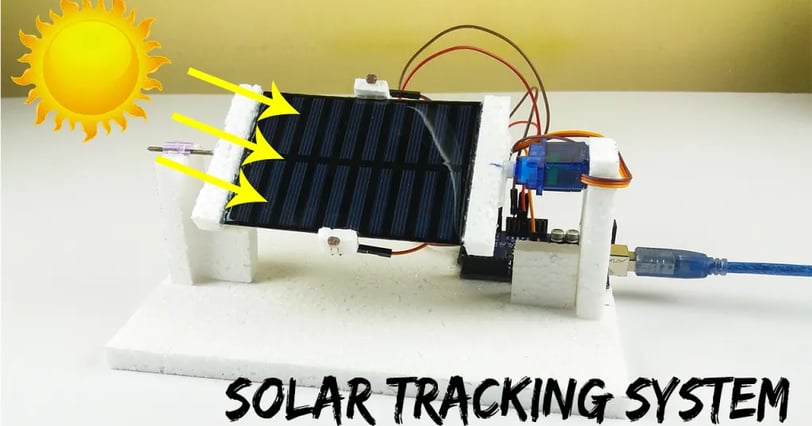
How to make a solar tracking system using Arduino step by step
Smart Shoes, Blind Assistance, Intelligent Walking Shoes, Assistive Technology, Obstacle Detection Shoes, Arduino Projects, Robotics for Accessibility, Haptic Feedback Shoes, Wearable Technology, Blind Navigation, Science Project, Innovative Design, Electronics Project, Blindness Solutions, Mobility Aid, Smart Footwear, Real-Time Obstacle Detection, DIY Assistive Device, Navigation Support, Sustainable Technology If you need any more changes or additional help, just let me know! Blog post description. write an discription ( How to make a solar tracking system using Arduino step by step ) Sider Fusion Description: How to Make a Solar Tracking System Using Arduino - Step by Step In this blog post, we will guide you through the process of creating your own solar tracking system using Arduino, a project that not only enhances your understanding of solar technology but also increases energy efficiency by maximizing sunlight exposure. Why a Solar Tracking System? Traditional solar panels are fixed in one position, which means they can only capture sunlight from a limited angle throughout the day. A solar tracking system uses sensors and motors to adjust the orientation of the solar panels, allowing them to follow the sun’s path across the sky. This results in greater energy output and more efficient use of solar power. What Will You Learn? The post will provide a detailed, step-by-step tutorial covering everything from the necessary components and tools to the coding and assembly of the tracking system. We will explain how to use photoresistors (light sensors) to detect sunlight and control servo motors or stepper motors to move the solar panel accordingly. Key Topics Covered: Materials Needed: A comprehensive list of components, including Arduino board, servo motors, photoresistors, resistors, and a breadboard. Wiring and Connection: Clear diagrams showing how to connect the components to the Arduino. Programming the Arduino: A breakdown of the code needed to read sensor values and adjust the panel's position. We’ll also provide explanations for each part of the code to help you understand how it works. Testing and Calibration: Steps to ensure your solar tracker functions correctly and efficiently tracks the sun throughout the day. By the end of this tutorial, you will not only have built a functional solar tracking system but also gained valuable insights into solar energy principles and Arduino programming. This project is perfect for anyone interested in renewable energy, DIY electronics, and wanting to reduce their carbon footprint. Stay tuned and get ready to harness the power of the sun more effectively!
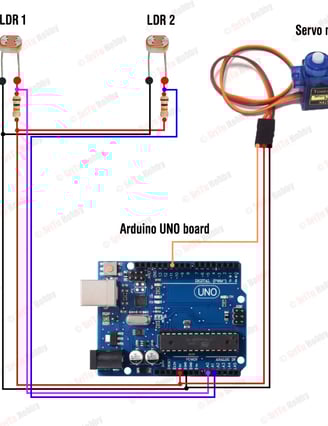
! Circuit diagram

code
/*Solar tracking system Home Page
#include <Servo.h>
Servo servoX; // Horizontal movement
Servo servoY; // Vertical movement
int photoResistor1 = A0; // Light sensor 1
int photoResistor2 = A1; // Light sensor 2
void setup() {
servoX.attach(9); // Attach first servo to pin 9
servoY.attach(10); // Attach second servo to pin 10
Serial.begin(9600);
}
void loop() {
int lightLevel1 = analogRead(photoResistor1); // Read light level from sensor 1
int lightLevel2 = analogRead(photoResistor2); // Read light level from sensor 2
// Move the first servo based on light levels
if (lightLevel1 < lightLevel2) {
servoX.write(servoX.read() + 1); // Turn towards the brighter sensor
} else {
servoX.write(servoX.read() - 1);
}
// Move the second servo based on light levels (optional)
// Use additional logic to control vertical movement if desired
Serial.print("Sensor 1: "); Serial.print(lightLevel1);
Serial.print(" | Sensor 2: "); Serial.println(lightLevel2);
delay(100); // Small delay for responsiveness
}
Components Needed
Arduino Board: Arduino Uno or Nano
Servo Motors (2): For adjusting the solar panel's angle (adjustable brackets recommended)
Photoresistors (2): Light sensors to detect sunlight
Resistors (2): 10k ohm resistors for the photoresistor circuit
Breadboard: For prototyping the circuit
Jumper Wires: For connections
Solar Panel: To be used with the tracking system
Battery or Power Supply: To power the Arduino and servo motors
Support Structure: To mount everything (you can use wood, plastic, etc.)
Step-by-Step Process
Step 1: Design the System
Understand the Mechanism:
The system will consist of two axes of movement (vertical and horizontal) to allow the solar panel to track the sun throughout the day.
Use two servo motors to control these movements.
Choose the Placement:
Decide where you will set up the solar panel and tracker, ensuring it has unobstructed sunlight.
Step 2: Gather and Connect the Components
Photovoltaic Sensors Setup:
Connect the two photoresistors to the Arduino with the following configuration:
One leg of each photoresistor goes to the 5V pin on the Arduino.
The other leg connects to an analog pin (e.g., A0 for the first sensor and A1 for the second) and also connects to a resistor that goes to the ground. This creates a voltage divider circuit.
Servo Motors Connections:
Connect the servo motors:
The control wire of the first servo connects to a digital pin (e.g., pin 9).
The control wire of the second servo connects to another digital pin (e.g., pin 10).
Connect the servo motor power leads to the 5V and GND pins on the Arduino.
Breadboard Setup:
Organize all connections on a breadboard for a clean and manageable setup. Use jumper wires to connect all components accordingly.
Step 3: Write the Arduino Code
Install the Arduino IDE:
If you haven’t already, download and install the Arduino IDE on your computer.
Program the Code:
Write a program that reads the values from the photoresistors and adjusts the servo motors to track the sun. Here is a simplified version of the code:
Upload the Code:
Connect your Arduino to your computer using a USB cable and upload the code.
Step 4: Assemble the Solar Tracker
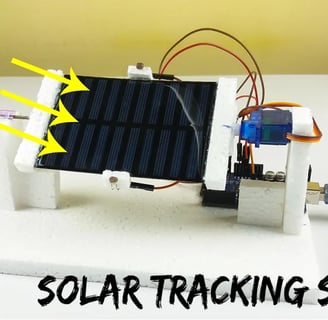
Mount the Solar Panel:
Securely attach your solar panel to the system structure with the servo motors ensuring it can rotate freely.
Test the Movement:
Power up the Arduino and observe the movements of the solar panel as it follows the light. Adjust the code and hardware as needed to improve tracking accuracy.
Step 5: Final Testing and Calibration
Monitor Performance:
Test the system throughout the day to see how well it tracks the sun.
Make adjustments to the code and angles of the servos if necessary.
Improve and Optimize:
If you want, add more features like an LCD display to show real-time data or incorporate a more complex algorithm for better tracking.
Conclusion
By following these steps, you've built a basic solar tracking system using Arduino that adjusts the position of a solar panel to maximize sunlight exposure. This project not only provides practical benefits but also enhances your understanding of solar energy concepts and Arduino programming. Feel free to iterate on the design and explore additional functionalities!